
There’s a lot of information on setting up Google Analytics 4 on a Wordpress site, but most of it’s confusing or doesn’t work for everyone. Our method of installing GA4 is easy, and has worked for every single site we’ve installed it on. Read more below if you’re ready to install Google Analytics 4 in less than 10 minutes.
Disclaimer: This guide does assume you have some previous Wordpress knowledge with installing plugins and the basics.
Installing Google Analytics 4 Is Easy With Prep Work
I know what you’re thinking. “Prep work?!” No worries it’s only one simple step that’s going to make everything a whole lot easier. You’re going to install a plugin named ‘Header Footer Code Manager‘ also known as HFCM. Just install and activate it and you’re ready to go.
Adding Google Tag Manager
First you’ll need to head over to Google Tag Manager and create an account.
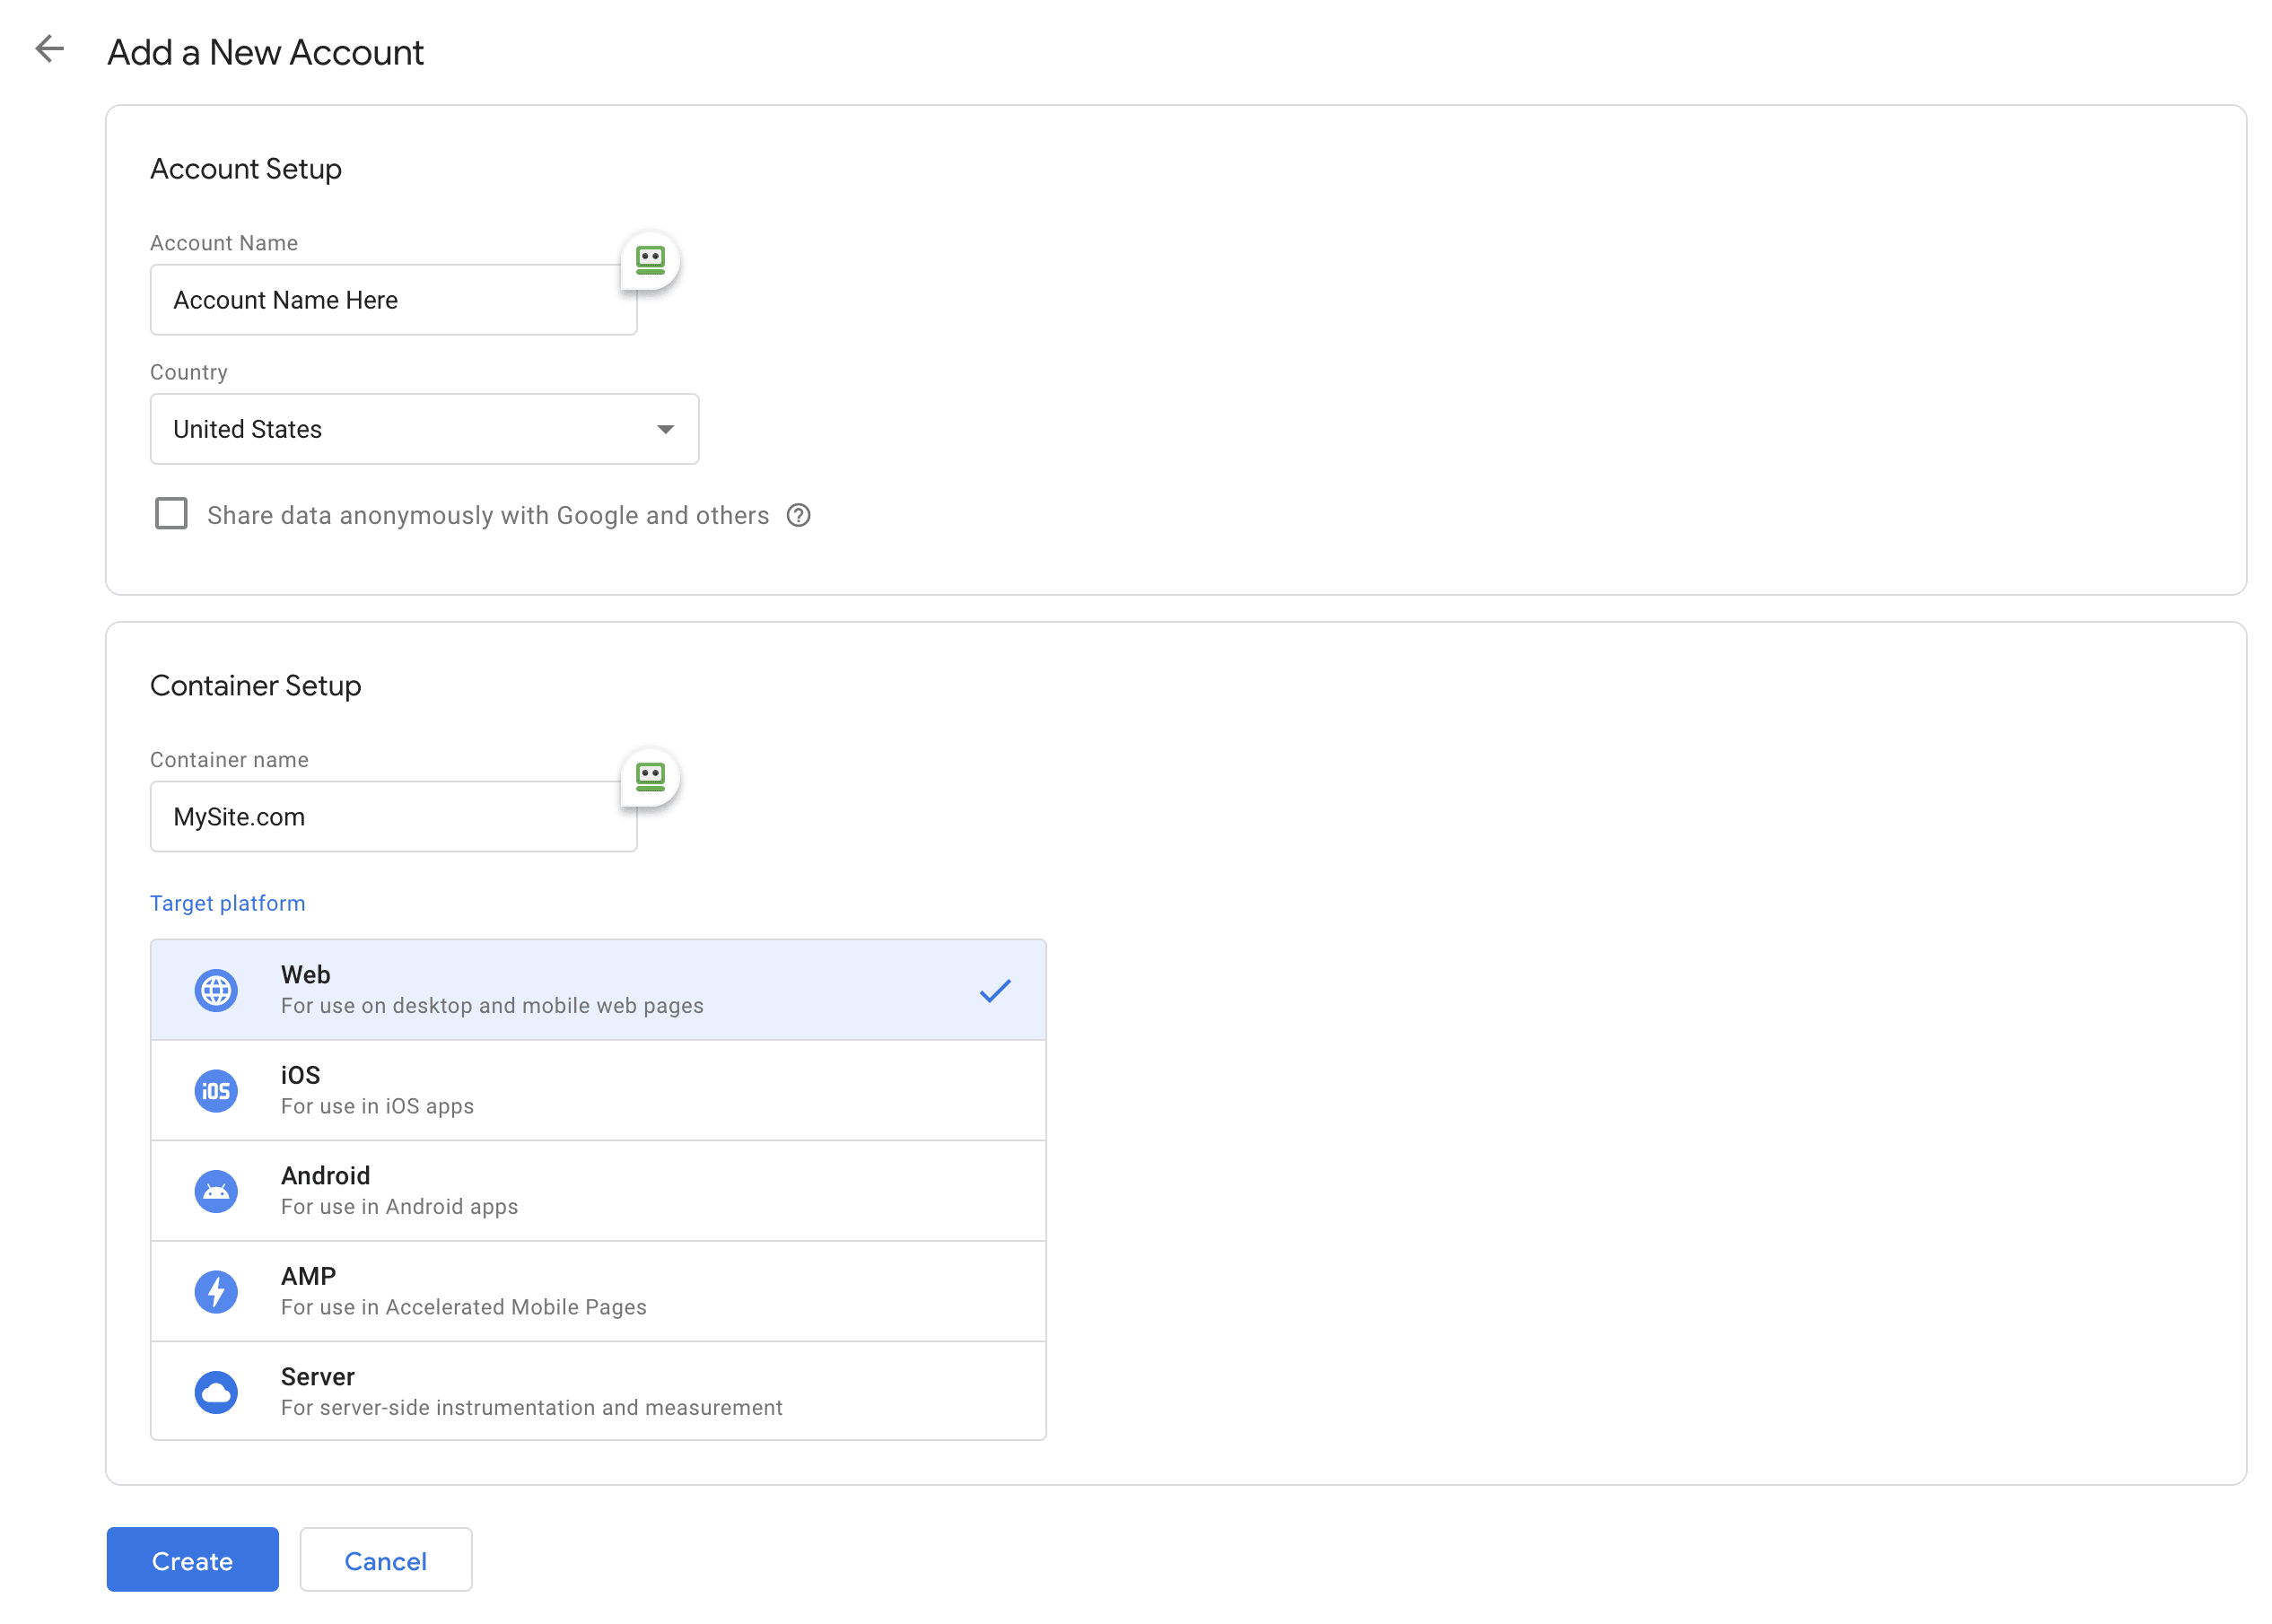
After you add the new account you’ll have some steps to follow and fields to fill in.
- Add your account name, can be whatever you want
- Container name can be whatever you want, usually name of business or domain name is what I use.
- Select “Web” and click “Create“
- Accept the Terms of Service Agreement
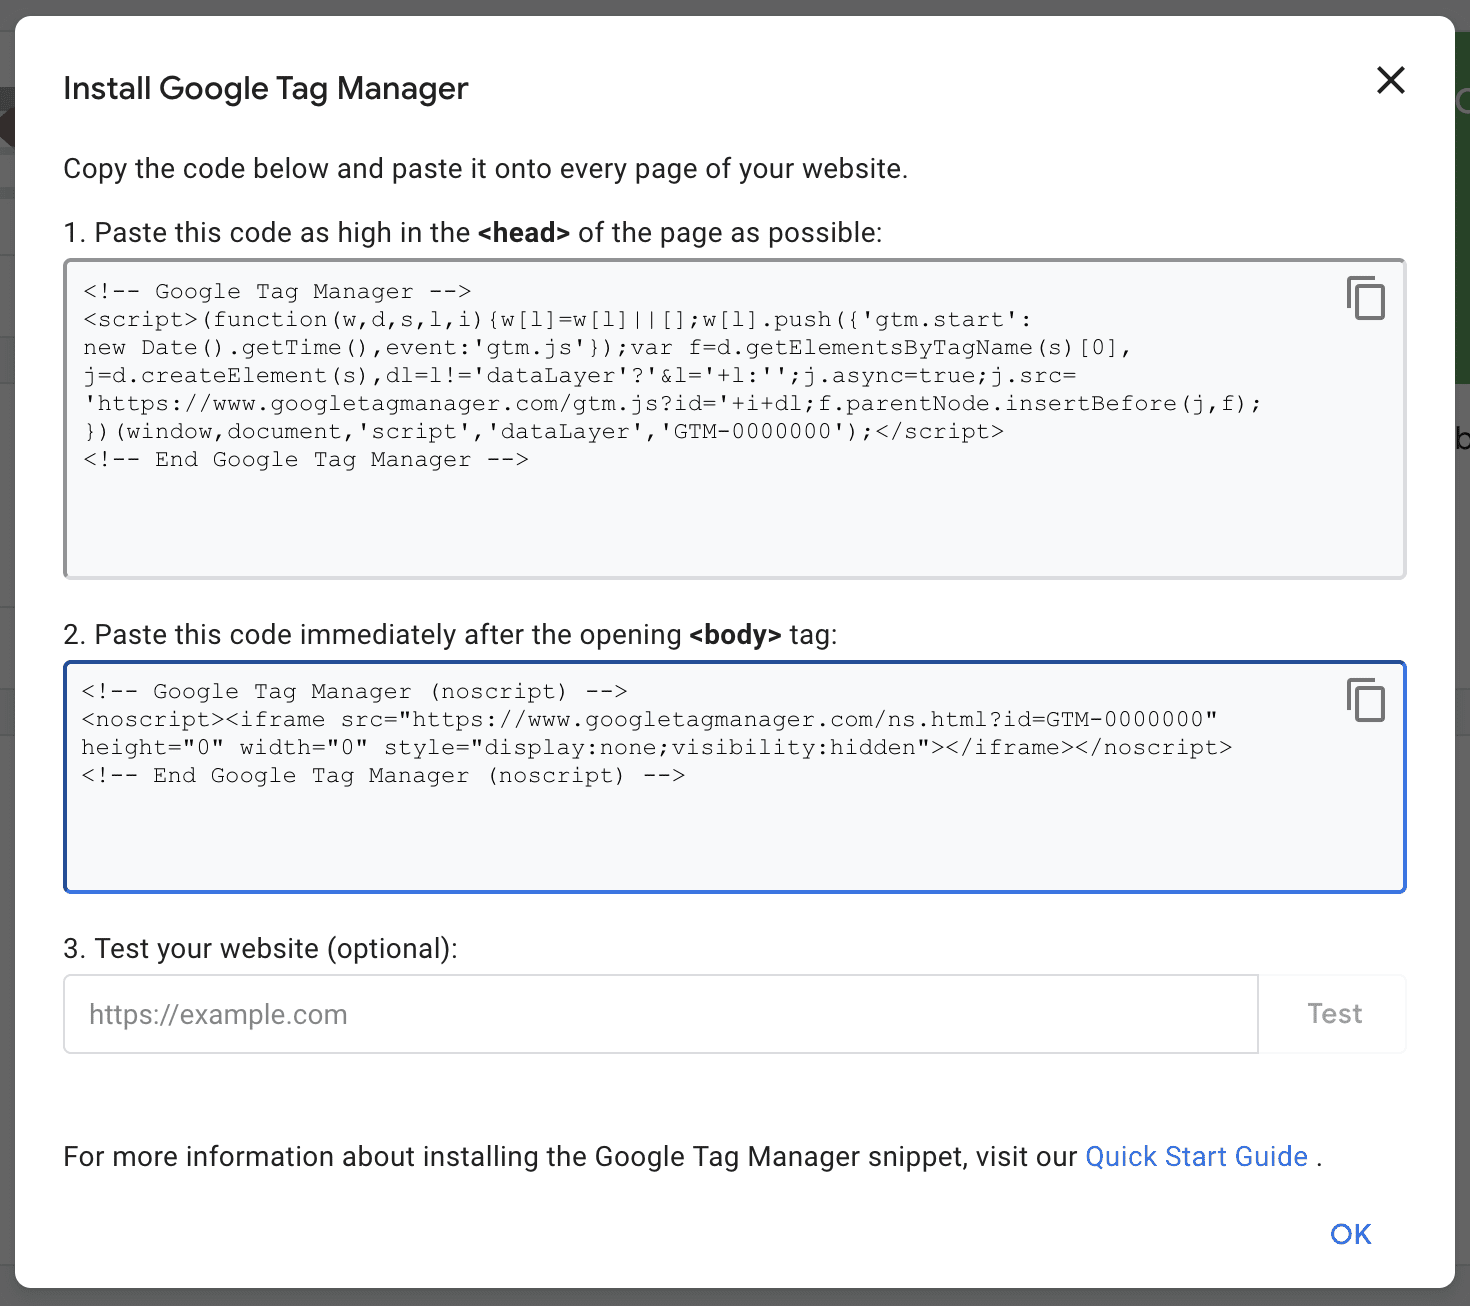
Next you’re going to see a screen that gives you your embed codes for Google Tag Manager, also referred to as your GTM code. There’s going to be one that you put in the <head> and one that you put in the <body>.
Adding Tag Manager Code to Your Site
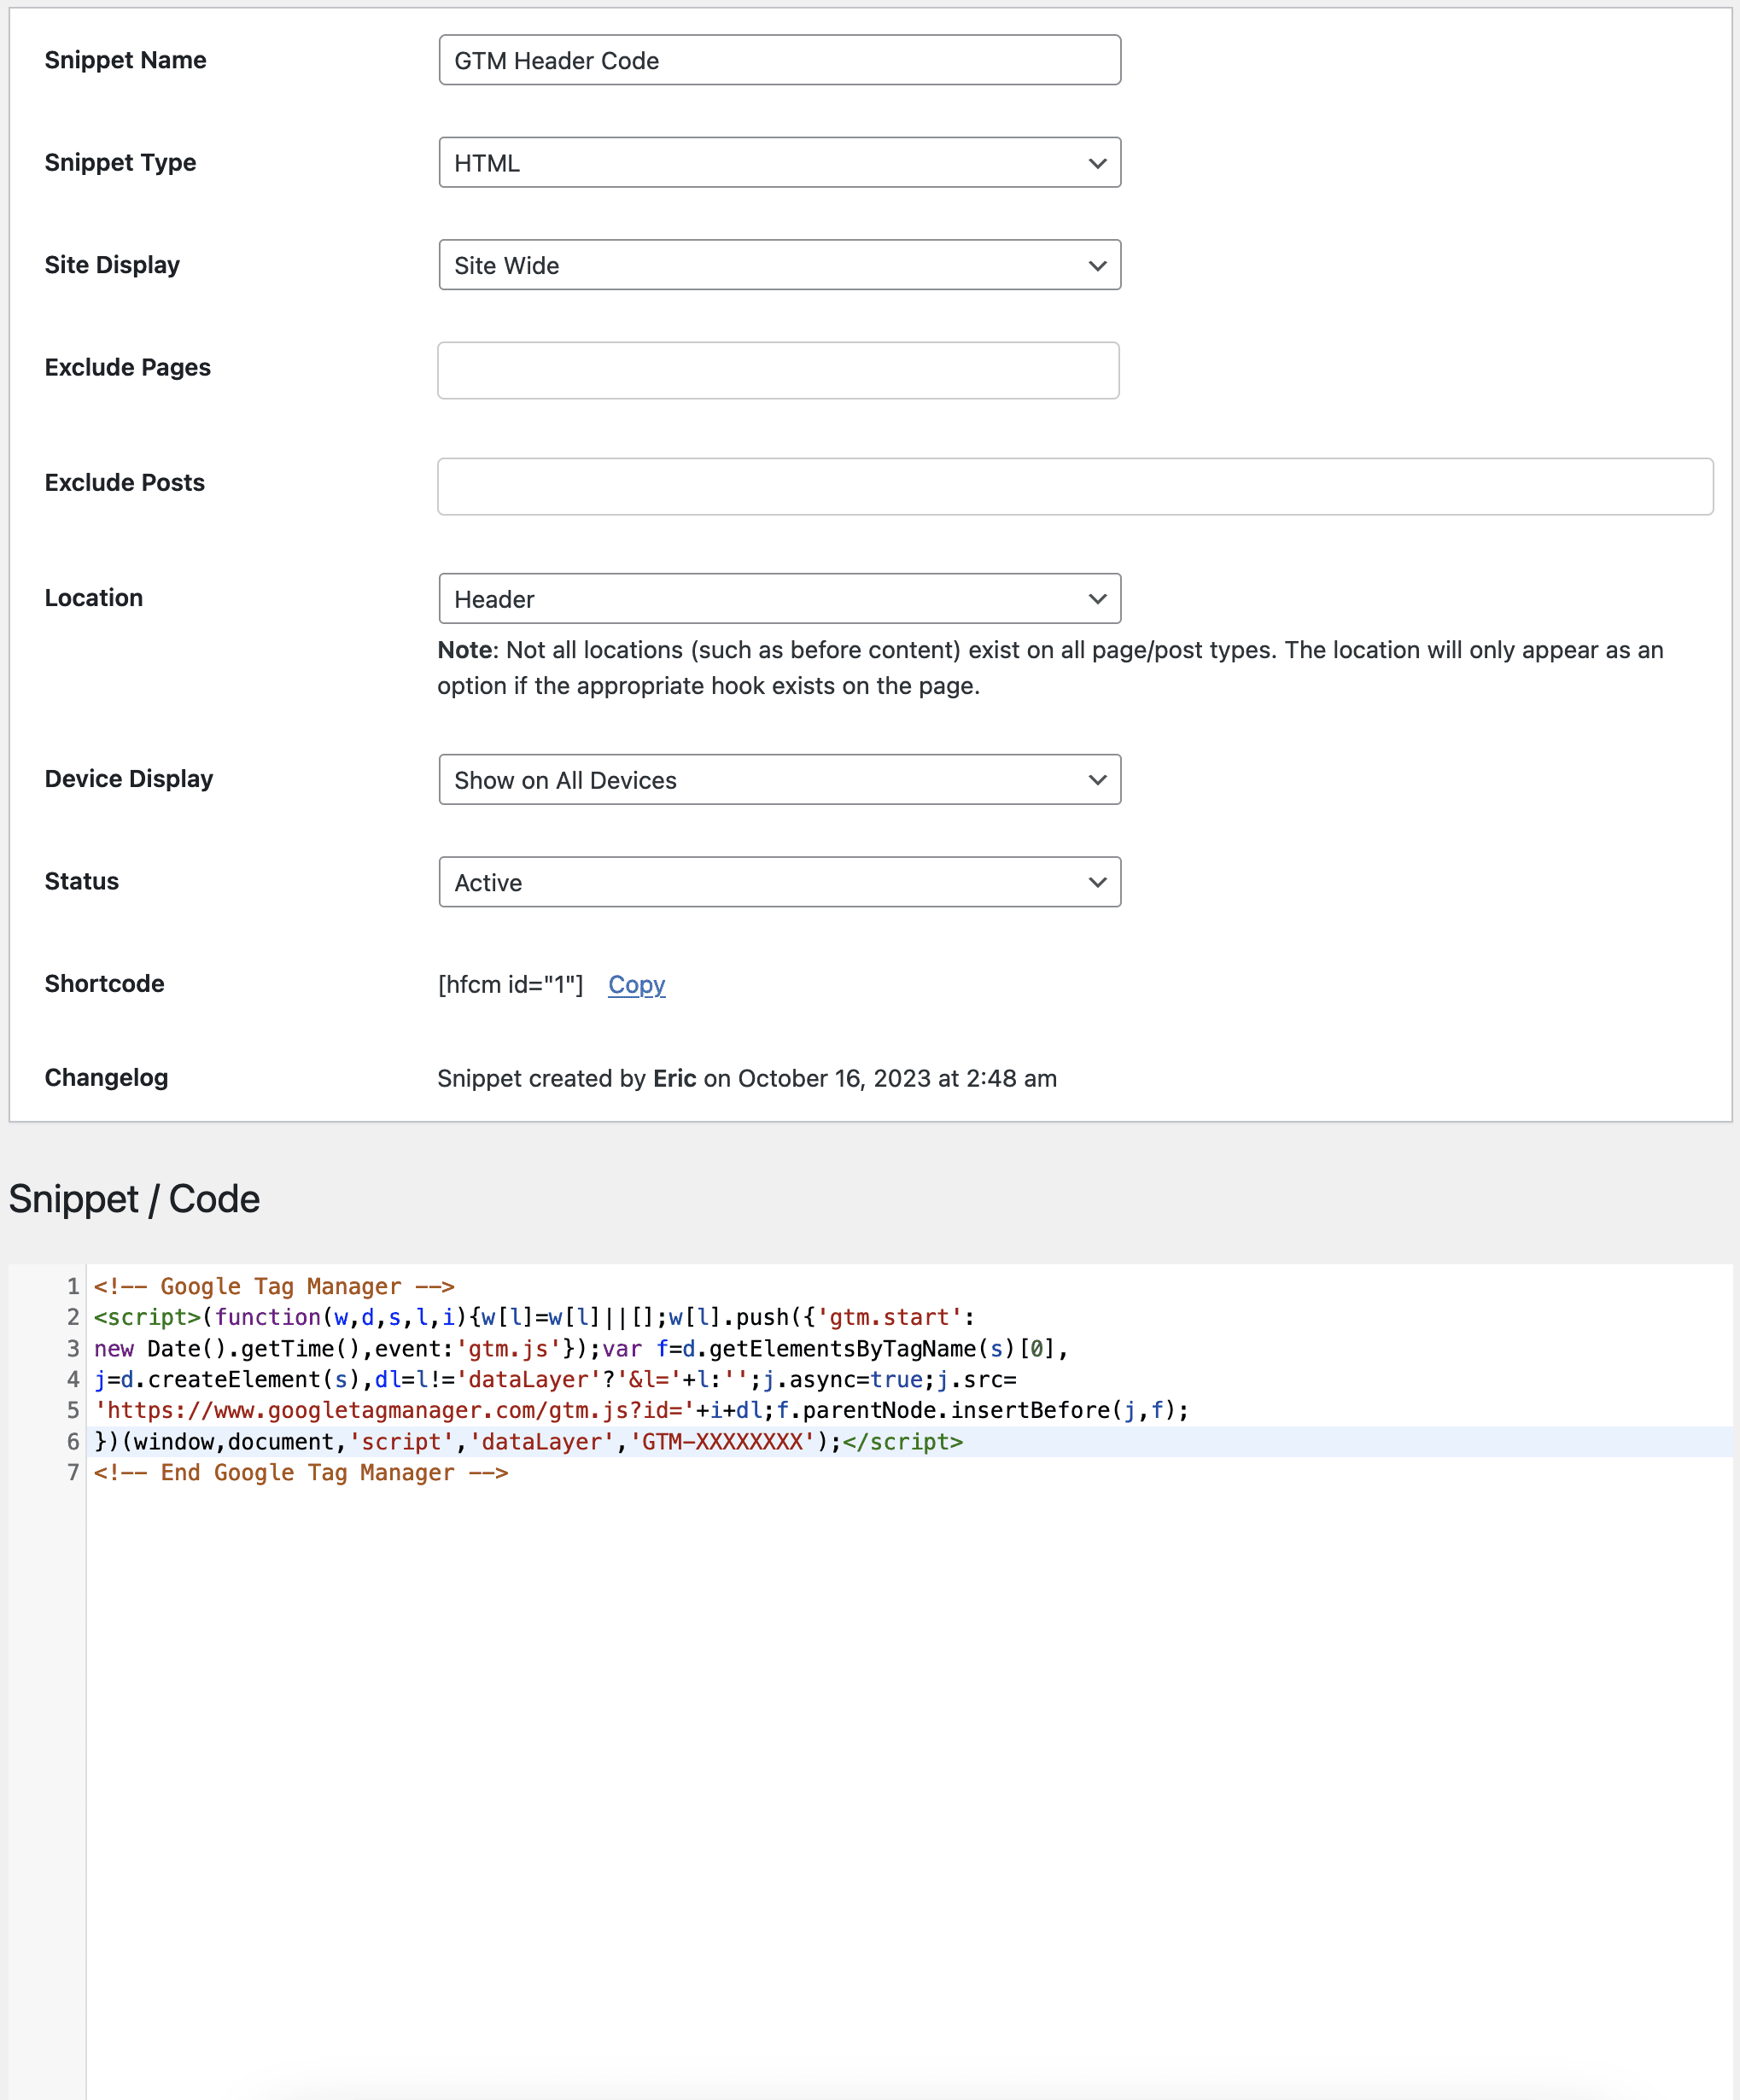
Now head over to your website and create a snippet in the Header Footer Code Manager plugin. I like to name this snippet “GTM Header Code”. Your default settings here are fine and all you need to do is copy the code and paste it into the Snippet/Code area and click “Update”.
Now create another snippet and name it GTM Footer Code. There’s only one minor change you need to make to the settings in this snippet and that’s to set the Location field to Footer.
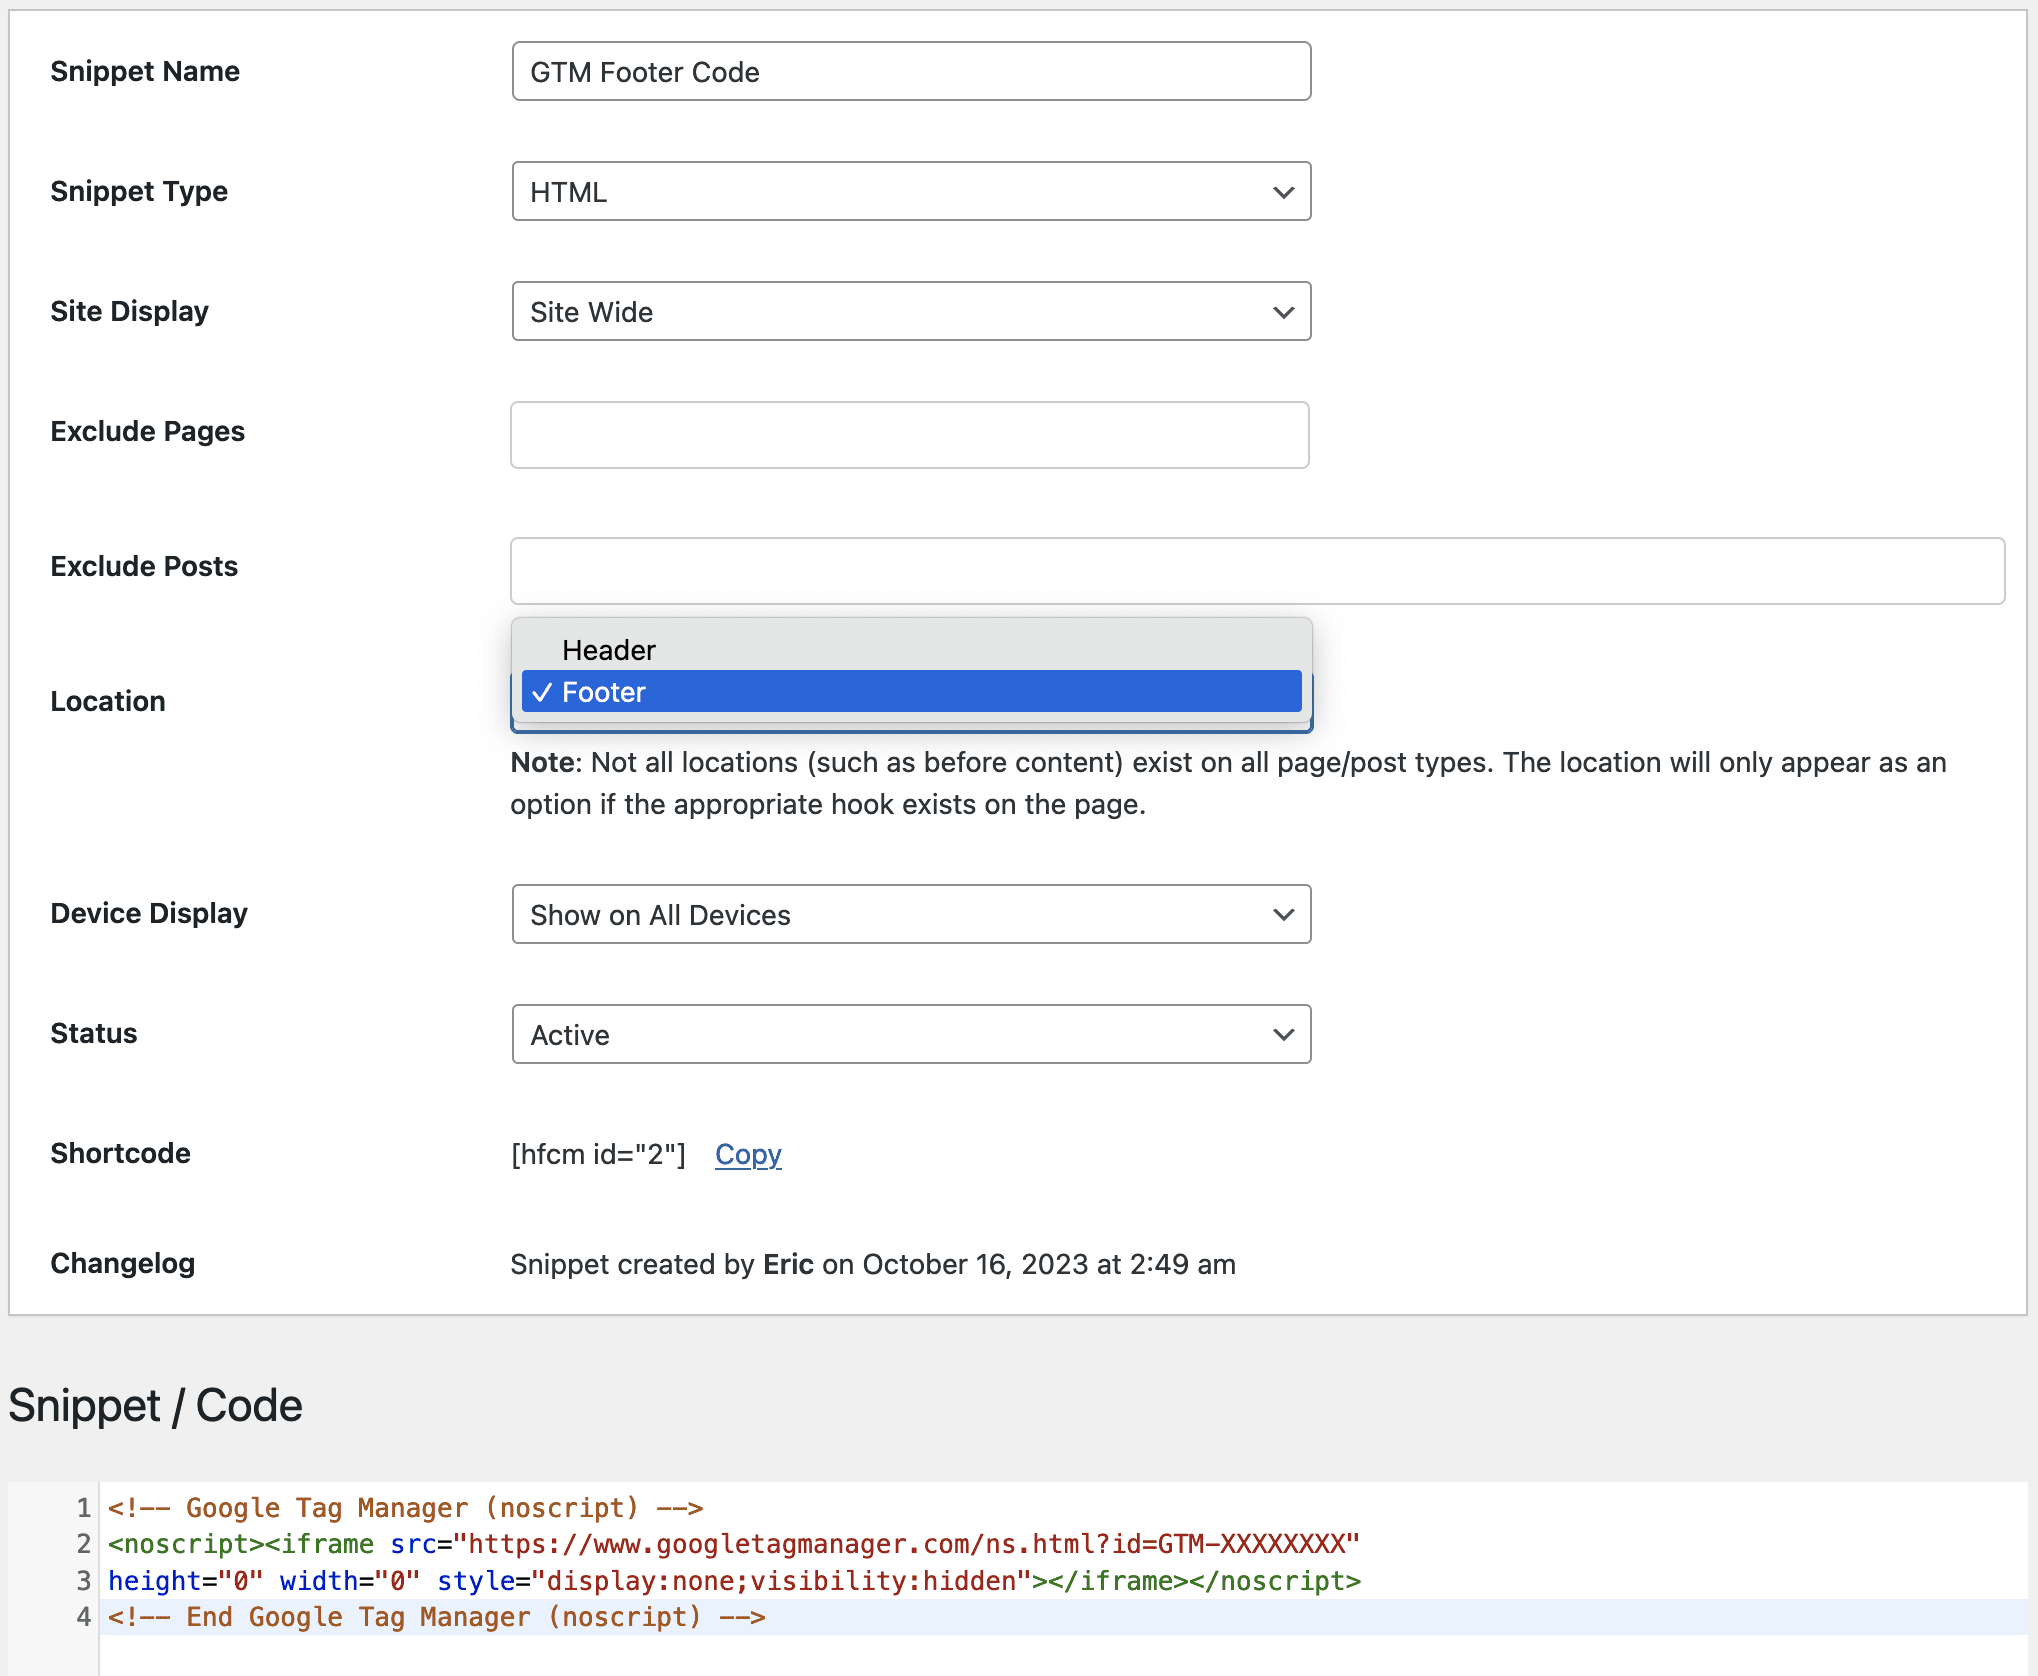
Then copy and paste the <body> code from GTM into the Snippet/Code area of HFCM.
And that’s it! You can use the preview tool (button in the top right corner that says ‘preview’) to make sure tag manager is installed correctly.
Setting up Google Analytics 4
Ok now we’ve laid the ground work, and there’s just 2 more easy steps that we need to complete.
Head over to Google Analytics.
If you haven’t already done so, setup an account. Or if you already have an Analytics account setup a new property. Which ever route you take, it’s an easy 5-step process.
Just sign up and follow the prompts. For some it may be a little confusing when you get to the 4th page of the sign up (don’t get discouraged, it’s like one question per page) and on this page of the sign up you’re presented with some check boxes. Just select “Get baseline reports” if you’re not sure what to choose here and you can always customize your reports later.
In the last step of this process you’ll also come to probably the most important step of all, Data Collection.
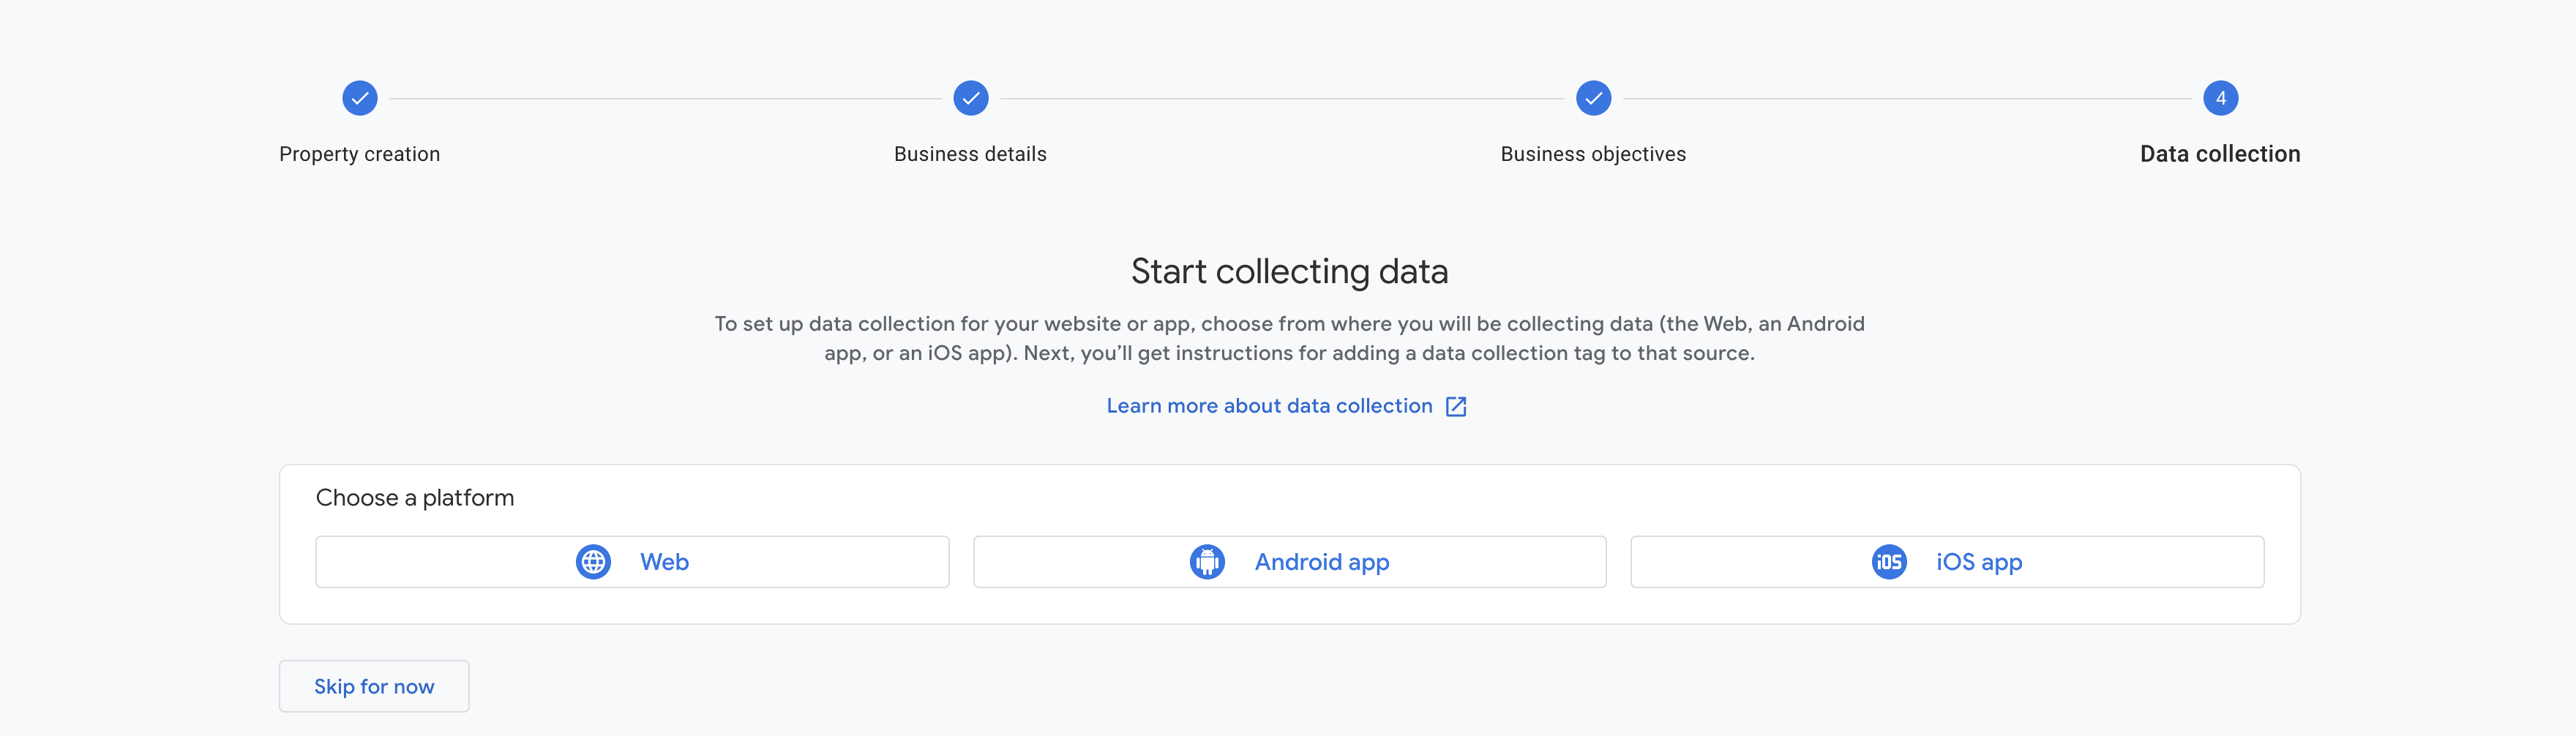
Select “Web“.
After selecting web a pop-up screen should appear that says “Set up data stream”
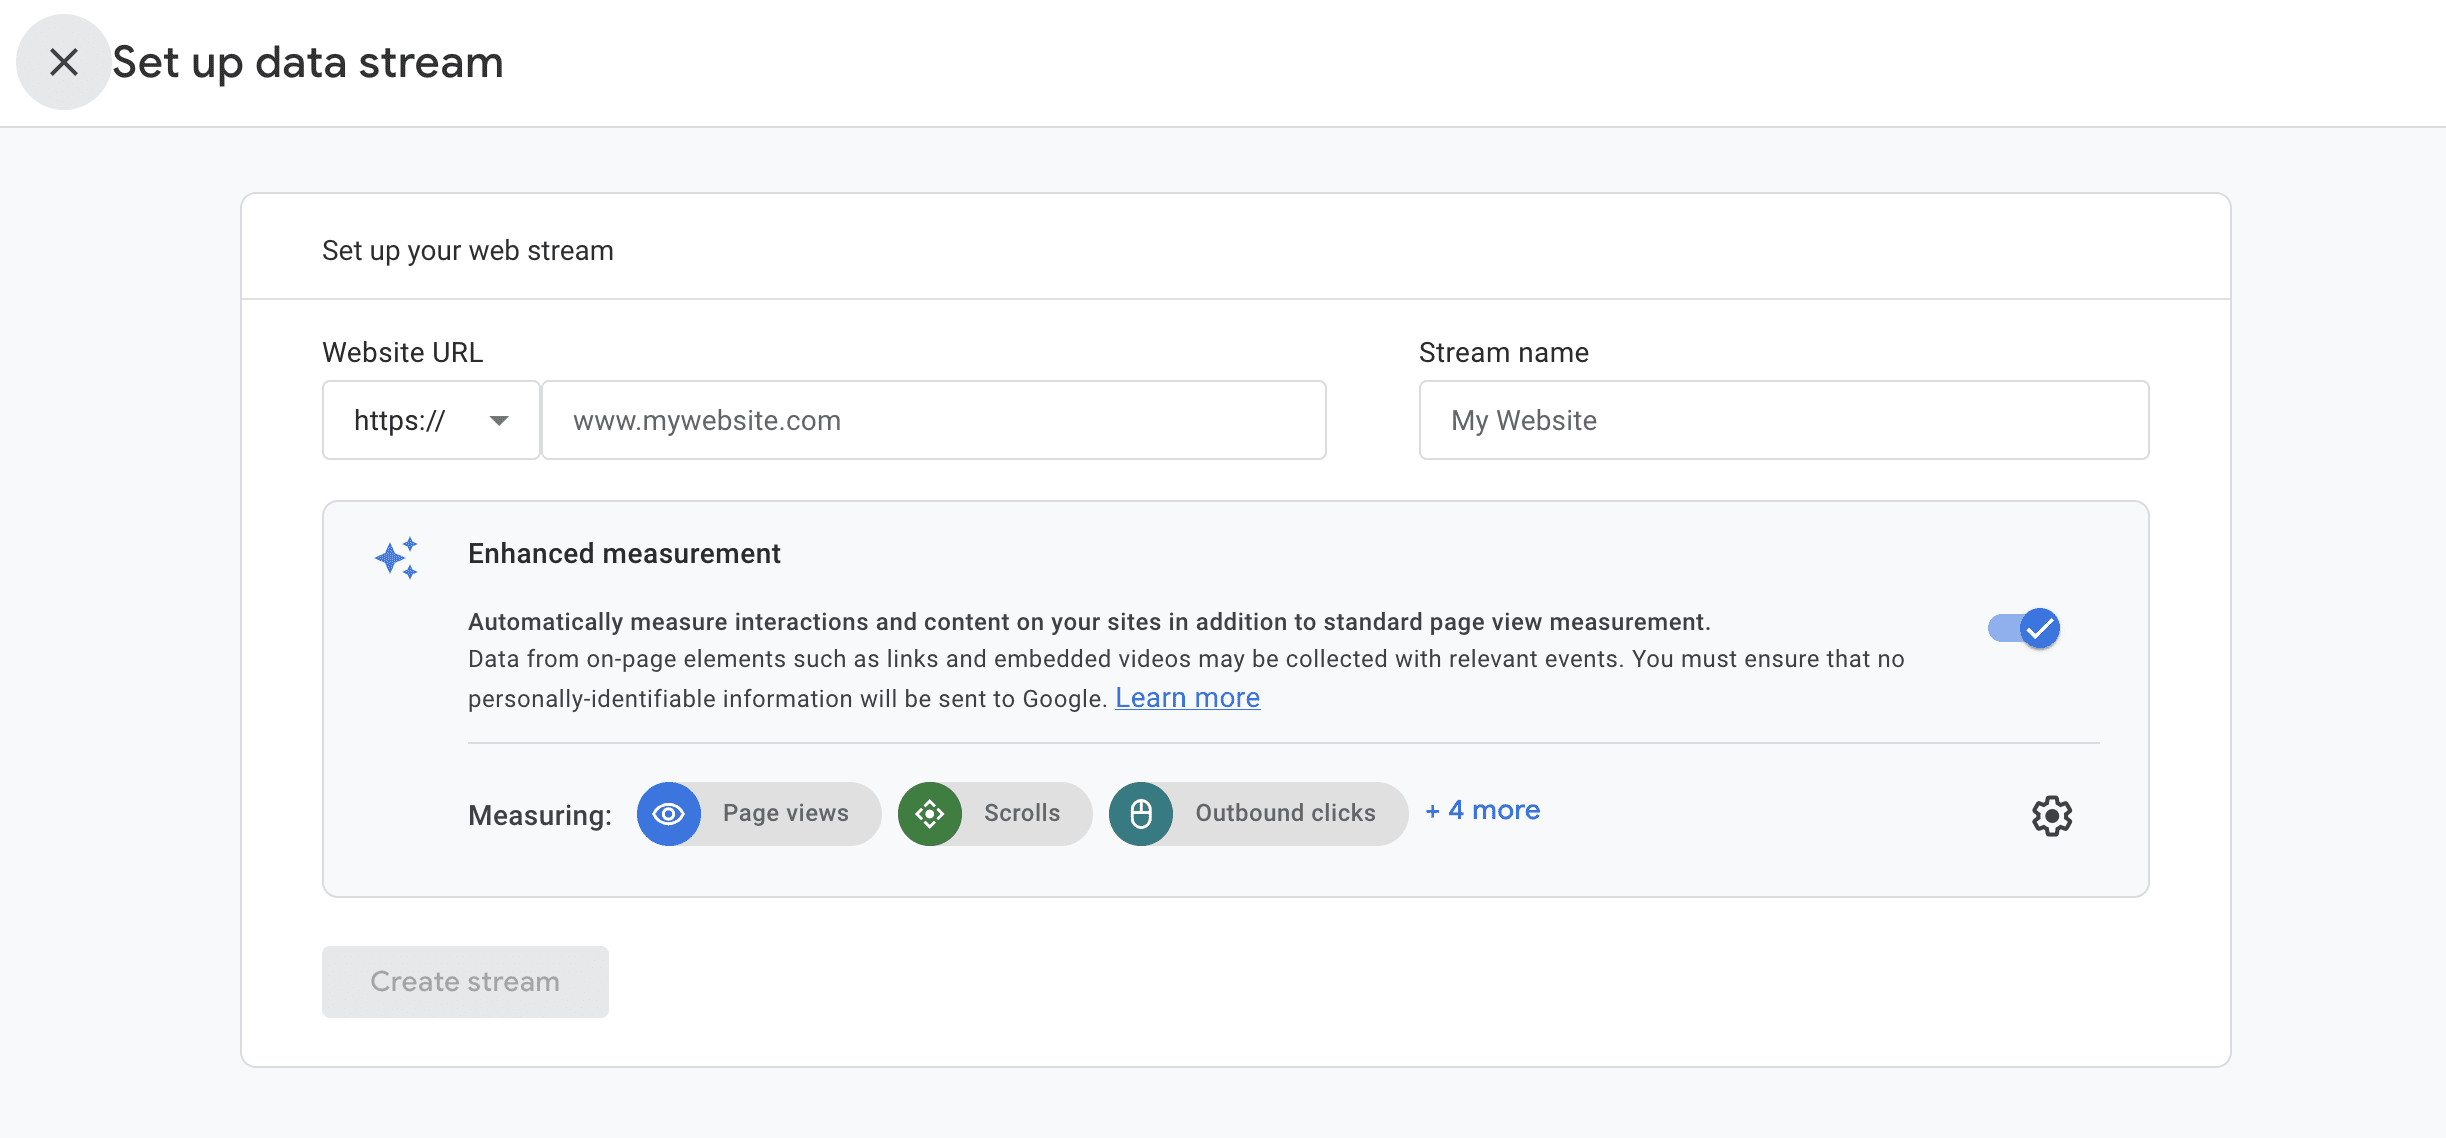
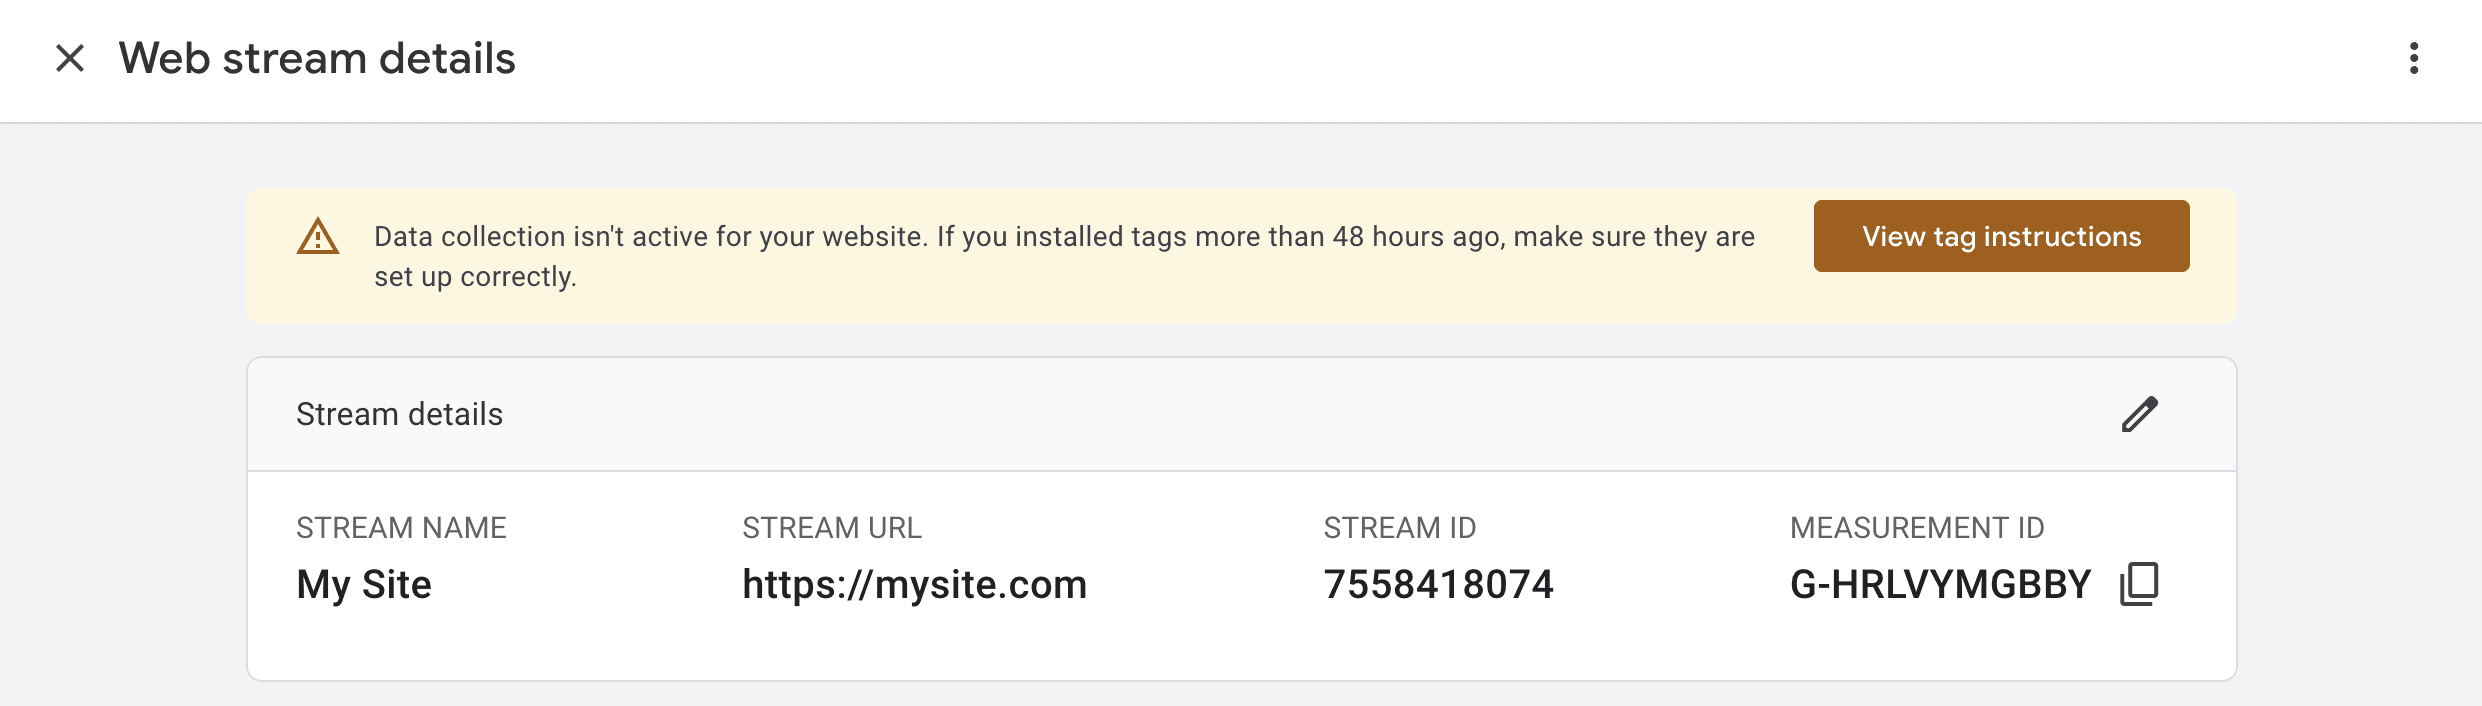
Add your website url and proceed to the next screen. This next screen/pop-up should say Web stream details. Here’s where you’re going to want to get your Google Tag and Measurement ID which are the same thing. Google has a way of making things confusing, but all you need to do is copy the MEASUREMENT ID from the Web stream details and store that.
If the instructions screen pops up then exit out. All you need is the below.
Adding Google Tag and GA4 Event in Tag Manager
Now that we’ve got our GA4 measurement ID, we can head to GTM and add our tags and triggers.
- In Google Tag Manager in the left hand side click on ‘Tags’. Once in Tags click on the button in the right corner that says “New”.
- Name your tag in the left hand corner of the pop-up window. I name it what it is, in this case “Google Tag”.
- Now click where it says “Tag configuration” in the box. Then select Google Tag with the blue icon.
- Add your measurement ID to the Tag ID field.
- Next click the “Triggering” box below it. Select “Initialization – All pages” Press Save in the right corner.
Now let’s add another tag. This time name it GA4 Event and follow the same instructions as before.
Tags > New > Name tag (GA4 Event) > Click Tag configuration > Choose Google Analytics > GA4 Event > Add Measurement Id
The only difference here is your going to name the ‘Event name’ something like ‘Page View’ and set the trigger to All Pages this time.
Now Press save and you’re all set to submit your Workspace in Google Tag Manager. Just go up to the right corner and press the ‘Submit’ button. You’re done, congratulations! Check your traffic by clicking around the site and visitng the ‘Realtime’ tab in GA4, but this has worked for us flawlessly time and time again and I’m sure it will work for you too!